Hello Beautiful Butterflies!
If you guys read my last post you will know that I tried and failed to make a Monster’s Inc inspired makeup look. It looked like I just graduated from Clown University, not even kidding. However, I’m not sure this is much better. It’s better than the first time I tried it, which is a good thing.
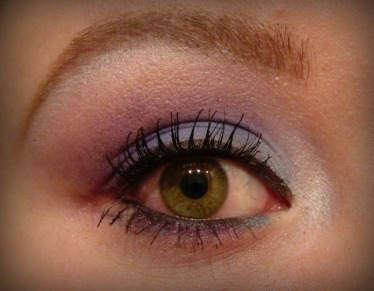
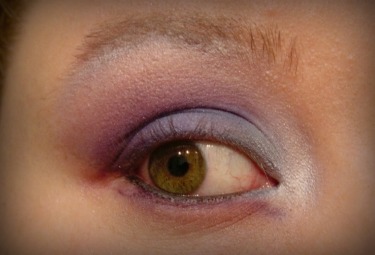
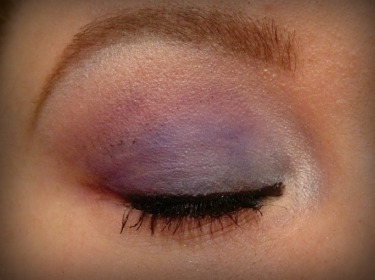
Also if you are wondering why on earth I have pick Sully from Monster’s Inc. as my inspiration for a makeup look, it’s because this week I am participating in the final RunDisney Expedition Everest Challenge. For my running costume I am dressing up as Sully from Monster’s Inc. If you haven’t checked out my sketch of the costume, click here. So I decided I would try to come up with a makeup look for the costume as well. Soo.. Here’s how it turned out:
* * * * * * * *
The next thing I am going to tell you will shock you, so brace yourself. You do not have to put primer on for this look. I know, I usually stress that you should apply primer to your lids. But when I did this look with primer it did not turn out at all. I will try a different primer next time.
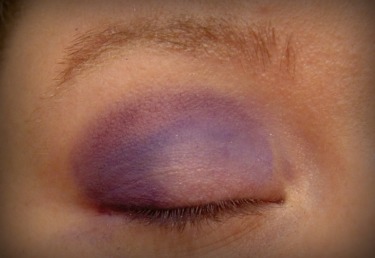
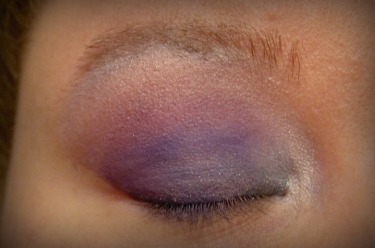
Now that we have the shock factor out of the way, apply a purple shadow in the crease. We are using a purple color in the crease because Sully has Purple all over his body. To blend the purple to the blue a bit better I applied a Blue-ish, Purple-ish, Indigo color just under the purple in the crease. Since I am not wearing any primer, the shadow is getting streaky. So to build the shadow up take the shadow up and pat it over the streaks in the shadow. Make sure you blend it. We do not want harsh lines.
After you have the Indigo and Purple down we are going to take a bright blue color to the lid of the eye. Make sure you are very light handed with this. You do not want to apply too much. Also make sure you are blending this into the Indigo color. Next you need to take a caramel shadow and apply it just above the purple in the crease. This is to just warm up the look to blend out the purple so you have nice blurred edges. Make sure you the caramel shadow isn’t too orange or too brown. For it to blend the purple it has to be the perfect caramel color. Then right under the brow take a light, shimmery blue shadow. In-between the caramel color and the light blue color take a light, shimmery pink color to blend the two colors together a little bit. Also take the same light blue, shimmery shadow that you put under the brow bone and apply it to the inner corner of your eye. Now it’s time for the lash line! Also, I did that thing again where I completely forgot I was doing a step by step tutorial. Sorry!
For the lash line, take the same purple color you put in the crease and apply it in the outer corners of the bottom lash line. I took a thing straight brush to apply this. Try to ignore what I did with the inner corners because I wiped the little wing away. for the inner corners I just applied the same light, shimmery blue shadow.
Line your eyes with a liquid pen or liquid eyeliner and line your waterline with a pencil eyeliner. The eyeliners should both be black. If you want to set the black eyeliner, take a black eyeshadow to do that. Apply your favorite mascara and do your eyebrows. You should be ready to scare people on the scare floor now!!
***Note: Use a light hand when applying blue eyeshadows, or any eyeshadows in general. It is easier to build up product than take product away. Blue is also very hard to work with. if it is streaky, is too clownish, or just doesn’t look perfect; don’t give up on the look. Just restart and try again. Don’t forget to blend!! Also, I did not include names of the eyeshadows I used because the products I used are nameless. I tried to describe the eyeshadow I applied to the best of my ability.***
* * * * * * * *
As you can tell, my eye got extremely irritated at the end for some reason. Try to ignore that part. But I really liked how this turned out. It went better than the first time I tried to make this look. I really hope you guys like it! I might try to see if I can make this happen on the day of the RunDisney race. We will see what happens I guess. Anyways, thank you so much for reading!! I hope you guys have a fabulous week!
Follow your dreams and never give up!!

